There are a lot of fun activities that you can partake in during your free time that can not only benefit you but your loved ones too. Bracelet making as a gift culture is a skill that is being cultivated by very many people around the globe. The best part is the diverse designs and materials you can use to design and make a bracelet based on your creativity. You can check out the internet for different unique designs that you or your loved ones might find intriguing and proceed to learn the guides on how they are made. In this guide are the tips you need on how to make rope bracelet today.
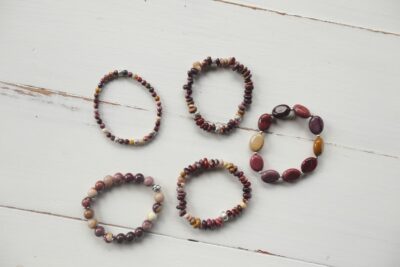
What are they called? Rope bracelets are also referred to as survival bracelets, 550 cord bracelets or parachute cord bracelet. It entails different types of ropes being intertwined and twisted together to form beautiful patterns and designs. To make the best bracelet you might be better off learning to tie different types of knots. Knots are very essential for bracelets as they help hold it in place without tampering with the fabrics of its twisting.
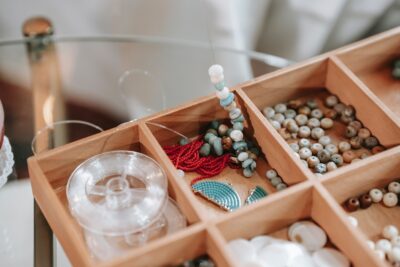
What Do I Need?
Embroidery floss
Thread
Pair of scissors
Extra decorations (paint, gems)
Step 1
The first thing you do with your rope is get your wrist measurements for you to make the size that fits well. You must thus have a length of rope that is double your wrist’s circumference with a little two inches extra for extra room. These extra inches are necessary in your measurement and can be used for making a knot that will be fixed to the clasp. You can however adjust the bracelet in the event that it is too saggy on your hand by removing the extra inches to make it fit.
Step 2
Now that you have your measurements right, you must start the bracelet making process. It commences with twisting the thread in one direction. The idea is to have all the thread or rope rolled on its self which means you should twist repeatedly to achieve the desired results. To make the process any easier, hold it on one end as you twist the other end to achieve the desired result.
Once the entire length of the rope is rolled onto itself, fold it into half which represents the circumference of your wrist. It is at this point that you notice the curls or rolls on the rope better as you smooth any lumps there may be out.
Step 3
This is the part where you make the knot for your bracelet. The ends of the bracelet will be joined together using a knot. There are different types of knots you can learn from tutorials online based on your interest. You should choose one know and create on the loose ends of your bracelet to make sure the rope does not begin to uncoil. Any extra loops after achieving the desired result can be cut off using a pair of scissors and trim it to complete the procedure.
Step 4
For the bracelet to fit on your hands securely, you need to attach the right type of clasp on its end. You can either use your fingers or tiny crochet hoop to open the coiled ends of the rope. It is the position where your knot should be in the setting. The bracelet needs flair and that means trimming the loose ends after you have fixed a clasp onto the created knot to allow for easy. Consider finding claps that can hold the knot in place if the bracelet is to fit your hands perfectly.
Why Choose a Rope Bracelet
Rope bracelets are easy to make and will take you a very short time to finish or make several. That said it is not easy to make which is why the recipient of such gifts appreciate the time, skill and precision invested in the making of the gift.
The procedure of making a rope bracelet is also enriching for you especially improving your adrenaline boost and inner peace for body and mind. It remains a unique way of expressing love to those you cherish through the art of gifting.
Rope bracelets beautifully reflect creativity, patience, and the joy of making something meaningful by hand. While crafting one can be a rewarding experience, there are times when a ready made piece with a refined finish feels just as special. DreamPigeon offers thoughtfully designed bracelets inspired by connection and individuality, making them ideal for gifting or everyday wear. Whether handmade or carefully selected, a rope bracelet carries value because it represents time, intention, and the bond shared with the person who receives it.