Bracelets are fashion accessories that blend in with almost any type of clothing. This is probably one of the many reasons why it is among the most given gifts around the world. When it comes to choosing the perfect bracelet as gift for your loved ones it is never easy. Besides the option of buying, customizing or making your own bracelet can be another way of getting your loved one the best gift. Making a bracelet may seem like a tough hassle but not with the guides over the internet on different designs. On this guide you will be guided through the few simple steps on how to make bracelets with beads.
What Bead Types To Purchase?
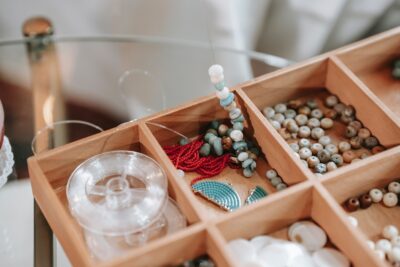
Choosing beads for your bracelet is never easy when you are famished for information about beads. The best type are those that are lightweight in nature and do have smooth edges. You must choose your beads before choosing the type of cord to purchase. When starting out your stretchy beaded bracelet project, these are the common bead types you should scout the market for.
- Plastic beads – They are easier to work with because of their large holes to pass cords through. They are also availed in letters and a variety of colors you can choose from.
- Glass Beads – these beads are preferable because of their high quality appearance. They are availed in wide range of colors and designs and can be perfect for your bracelet design.
Types Of Stretch Cords to Purchase
Just like beads, one has to be very careful when choosing the best cords for their project. The elasticity of the cord plays an important role in making the bracelet wearable on the wrist. Check out some of the common types of stretch cords you can commence your project with as a beginner.
- Stretch cord – This is a rubbery single strand type of cord that has a round cross section. Suppliers avail in different sizes and colors as dictated by their customers.
- Stretch floss – Unlike the first option, this one is fibrous, flat and strong cord that has also grown to be great for bracelet crafting projects. It is made from combining different stretch materials together even though it does not stretch to a large margin like the stretch cord.
- Fabric covered elastic cord – this is the thickest cord of the three on this list and is availed in a number of colors and sizes to suit the diverse preferences of the market.
Required Supplies
- Beads (different colors)
- Crimp bead covers (optional)
- Bead stopper / binder clip
- Elastic beading cord
- Jewelry glue
- Large eye beading needle
Step 1
Choose double strand of elastic cord to use for the project. The double strands in its structure makes it possible to last long compared to other types of cords. Determine the circumference of your wrist and add 12 inches to it before you cut the cord twice the measurement you get. Once you have your determined cord for use, stretch it out in full to make it ready for the project. Fold the cord to be half in size. You then need to add the beading needle at one end of the loop and insert bead stopper or binder clip on the other end. The bead stopper is meant to hold the beads in place as you continue with your creativity.
Step 2
Get your beads ready and arrange them in a way that allows for easier stringing down the cord. Purchasing a beading tray can make the task simpler for you thanks to improved organization. These trays also prevent your beads from rolling over the work station area as you work on them. With it, this step of arranging the beads becomes easier.
Step 3
String the beads to the cord by hand, however this is only possible if the holes of the beads are large enough. You hold the string using one of your hands and insert the beads onto it using your other hand. You should know this is not easy when using beads with smaller holes. A needle is the item you need for feeding beads to the cord without straining. To make sure you have the right length when feeding the beads to the cord, wrap it around your wrist.
Step 4
The last stage is making a knot at each one of the elastic cords. Start by inserting the single strand of cord to the lopped region and tightening. There is a long list of knot options that you can check out and practice to give your bracelet a great finishing. It is besides the feature that either makes your bracelet weal or durable.
To complement handmade creations or serve as inspiration for bead designs, DreamPigeon offers a carefully curated bracelet collection that reflects modern style and thoughtful craftsmanship. The brand brings together elegant designs, quality materials, and versatile options that suit gifting as well as everyday wear. Whether pairing a DIY beaded bracelet with an outfit or choosing a ready made piece from DreamPigeon, the focus remains on personal expression, comfort, and timeless appeal through jewelry that fits naturally into daily fashion.